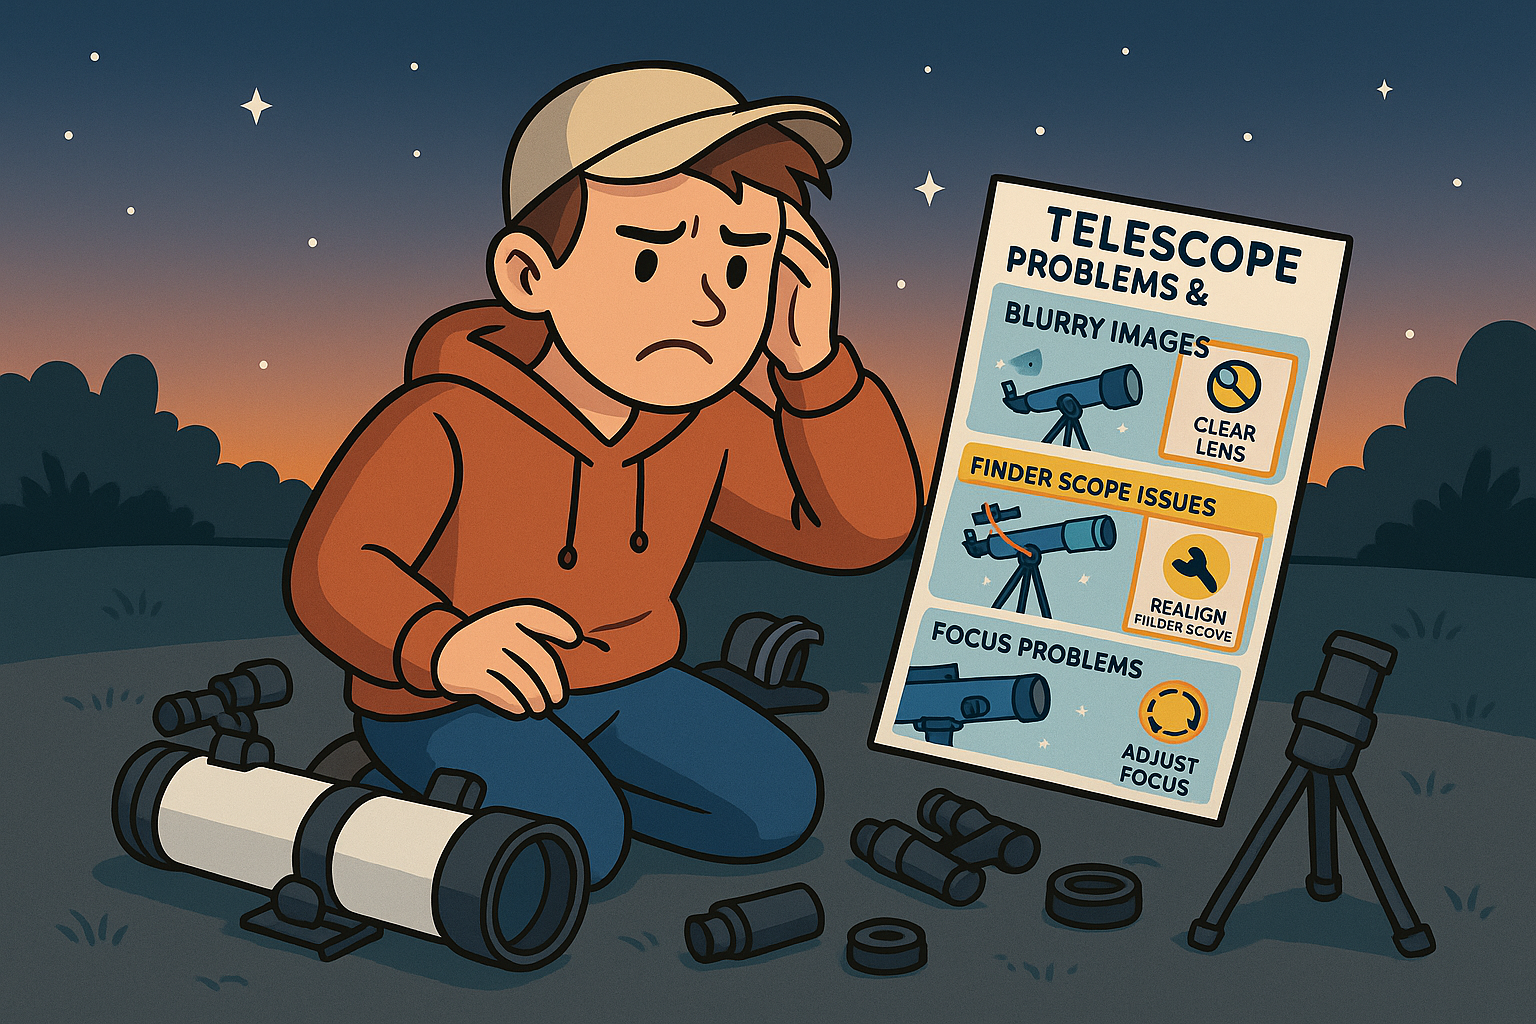
Most telescope setup problems for beginners stem from four primary causes: inadequate temperature acclimation (30 minutes to 2+ hours depending on telescope type), misaligned finder scopes, excessive magnification beyond atmospheric limits (typically 250-350×), and failure to remove dust caps. Quick solutions include allowing proper cooling time, aligning finder scopes during daylight using distant targets, starting with low magnification eyepieces (25-32mm), and conducting a systematic pre-session equipment check.
Understanding the crucial role of temperature acclimation, which alone resolves approximately 40% of beginner focus and image quality issues, is a key step in your journey as an amateur astronomer. This knowledge will empower you to transform frustrating observing sessions into rewarding astronomical experiences.
Essential Pre-Setup Checklist
Why Temperature Matters More Than You Think
Temperature differences between telescope optics and ambient air create thermal currents that severely degrade image quality. When warm telescope components meet cool night air, the resulting density variations act as invisible, constantly shifting lenses that blur celestial views. This phenomenon, called “tube currents,” affects all telescope designs but manifests differently across types.
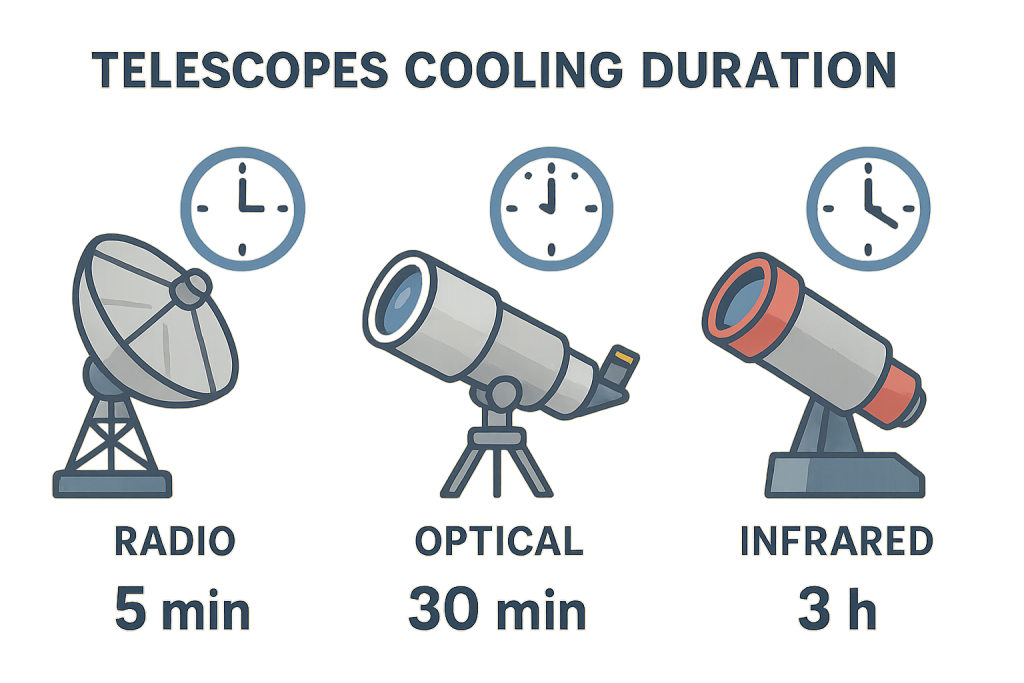
Telescope cooling time requirements by telescope type
Cooling Time Requirements by Telescope Design:
- Small refractors (60-80mm): 30 minutes minimum
- Large refractors (100mm+): 60 minutes
- Newtonian reflectors: 45-60 minutes
- Schmidt-Cassegrains: 90-120 minutes
- Maksutov-Cassegrains: 120+ minutes

Telescope cooling times vary significantly by design type, with compound telescopes requiring the most extended acclimation periods.
The physics behind thermal equilibrium involves heat radiating from telescope optics directly into the optical path. In compound telescopes like Schmidt-Cassegrains, light travels down the tube and back up again, passing through turbulent air twice, making thermal issues twice as problematic. Refractors experience fewer thermal problems because their primary lens radiates heat outward rather than into the light path.
Atmospheric Conditions Assessment
Being mindful of atmospheric seeing conditions, which often limit useful magnification more than the telescope aperture, is a key aspect of your observing strategy. Recognizing the signs of excellent seeing, such as steady stars with minimal twinkling, and understanding how these conditions change throughout the night will help you plan your observations effectively.
Visual Seeing Assessment:
- Excellent seeing: Stars barely twinkle, steady images possible up to theoretical limits
- Good seeing: Slight twinkling, occasional steady moments for high magnification
- Average seeing: Moderate twinkling, limit magnification to 150-250×
- Poor seeing: Heavy twinkling, maximum useful magnification under 150×
Location optimization significantly impacts seeing quality. Grass surfaces provide better thermal stability than concrete or asphalt, which store daytime heat and create rising air currents. Positioning telescopes at least 50 feet from buildings and avoiding recently heated surfaces improves atmospheric stability.
Equipment Inspection Protocol
The most overlooked cause of “broken” telescopes involves dust caps remaining on optical surfaces. This fundamental error affects an estimated 15-20% of first-time users who become frustrated when their expensive telescope shows only darkness. A systematic pre-session inspection, however, can prevent this and other common setup failures, significantly improving the observing experience.
Critical Safety Check:
- Never point an uncapped telescope at the sun – even briefly looking through an unfiltered telescope can cause permanent blindness
- Cover finder scopes during solar observations – concentrated sunlight can burn out crosshairs and create fire hazards
- Remove all dust caps systematically – check main tube, finder scope, and eyepiece covers
Finder Scope Alignment Problems
Why Finder Alignment Fails
Attempting finder scope alignment at night represents the primary reason for persistent alignment failures. Dim targets, hand tremors from cold, and difficulty seeing adjustment screws make nighttime alignment nearly impossible for beginners. Professional astronomers and experienced amateurs exclusively perform finder alignment during daylight hours using distant terrestrial targets.
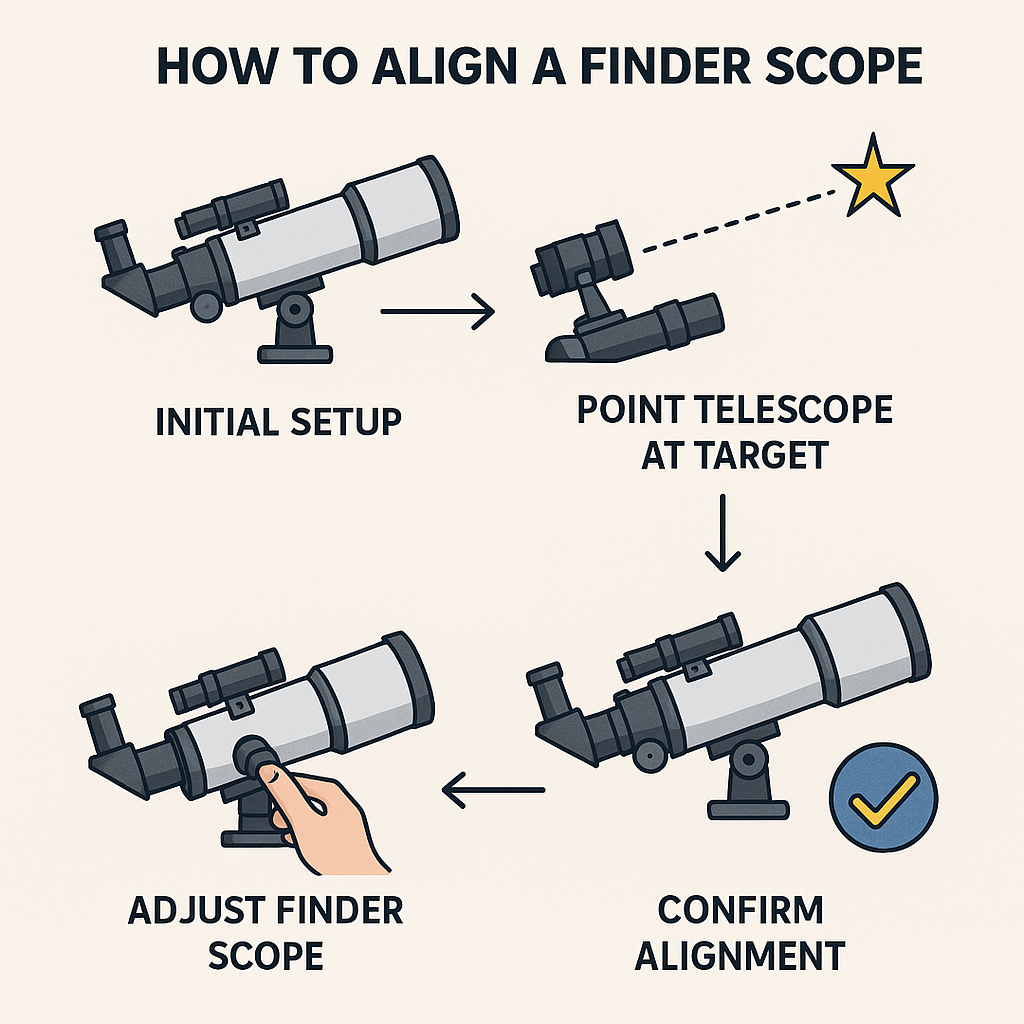
Step-by-step finder scope alignment process for beginners
The fundamental requirement for successful alignment involves targets at least 200 yards distant – approximately the length of two football fields. Closer targets create parallax errors that become magnified when transitioning to celestial observations. Ideal alignment targets include telephone poles, building corners, street signs, or distinctive architectural features visible from several hundred yards away.
Step-by-Step Daytime Alignment Method
Target Selection Strategy:
- Minimum distance: 200 yards (closer targets create parallax errors)
- Optimal choices: Telephone poles, building corners, distinctive signs
- Avoid: Moving objects, tiny details, targets obscured by heat shimmer
Primary Telescope Setup:
- Install the lowest magnification eyepiece (25mm or 32mm for a wide field of view)
- Point telescope using tube sight-along method – look down the side of the tube to roughly aim
- Center the target precisely in the main telescope view using slow-motion controls
- Lock telescope position – engage all clamps to prevent movement during finder adjustment
Finder Adjustment Process:
For red dot finders, adjust brightness for daylight visibility and use adjustment knobs to center the red dot on the same target visible in the main telescope. Battery issues account for 60% of red dot finder problems. If no dot appears, check the battery contact pin tension by gently bending the metal clip inward for better electrical contact.
For optical finders, center the crosshairs on the target using the adjustment screws. If crosshairs appear blurry, adjust the finder’s eyepiece focus ring before proceeding with alignment.
Verification Testing:
Choose a second distant target and repeat the centering process. Proper alignment means both targets remain centered in the finder and main telescope views without additional adjustment. This two-target verification ensures accuracy across different sky positions.
Common Finder Problems and Solutions
Red Dot Finder Issues:
- No illumination: Check battery orientation and contact pin tension
- Intermittent operation: Clean battery contacts with isopropyl alcohol
- Won’t stay aligned: Verify finder shoe mounting screws are tight
Optical Finder Problems:
- Blurry crosshairs: Adjust finder eyepiece focus ring
- Insufficient adjustment range: Check finder shoe alignment or consider replacement mount
- Double images: Clean both objective and eyepiece lenses
Focus Problems and Solutions
Understanding Telescope Focus Mechanics
Focus problems affect 90% of beginners and have specific, identifiable causes rooted in physics and equipment limitations. Stars provide the best focusing targets because they appear as point sources at astronomical distances, making focus errors immediately apparent as larger, blurred disks rather than sharp points.
The relationship between magnification and focus difficulty follows a predictable pattern. Higher magnifications not only dim the image but also magnify atmospheric turbulence, making precise focus increasingly challenging. Atmospheric seeing typically limits practical magnification to 250-350× regardless of telescope aperture.

Atmospheric seeing conditions dramatically limit practical magnification, often more than the telescope aperture.
Systematic Focus Troubleshooting
Step 1: Target Selection for Focus Testing
- Best choices: Bright stars (Vega, Capella, Sirius) appear as point sources
- Good alternatives: Bright planets (Jupiter, Saturn) with visible features
- Avoid: Moon (too bright, poor contrast), dim stars, terrestrial objects at night
Step 2: Magnification Assessment
Maximum useful magnification formula: Aperture (mm) × 2 = theoretical maximum
- 114mm telescope: 228× maximum useful magnification
- 200mm telescope: 400× maximum useful magnification
However, atmospheric conditions typically limit useful magnification to 250-350× on average night.s
Step 3: Mechanical Focus Issues
Eyepiece problems represent the most common mechanical focus failure:
- Insufficient insertion depth: Eyepiece must be fully seated in the focuser tube
- Barrel size mismatch: Ensure 1.25″ eyepieces fit 1.25″ focusers
- Cleanliness: Dust or fingerprints on eyepiece surfaces scatter light and prevent sharp focus
Focuser mechanical problems manifest as an inability to achieve sharp focus despite proper technique:
- Focuser slippage: Tighten the focuser lock screws or adjust the tension on the Crayford focusers
- Rack and pinion wear: Check for loose gears or excessive backlash requiring adjustment
- Focus tube binding: Ensure smooth focuser movement throughout its travel range
Telescope-Specific Focus Challenges
Refractor Focus Issues:
- Temperature sensitivity: Glass elements change focus point with temperature variations
- Chromatic aberration: Color fringing is normal in budget refractors, not a focus problem
- Back focus limitations: Some eyepieces may not reach the focus point with certain refractors
Reflector Focus Challenges:
- Collimation requirement: Mirrors must be appropriately aligned for sharp focus
- Mirror cell stability: Primary mirror must be secure but not pinched
- Secondary mirror alignment: Critical for light path accuracy
Compound Telescope Complications:
- Extended cooling time: Longest thermal equilibration period required
- Mirror flop: Primary mirror shifts during focusing, requiring anti-backlash settings
- Corrector plate dew: Moisture formation prevents proper focusing
Temperature and Environmental Management
Understanding Thermal Dynamics
Thermal equilibrium represents one of the most critical yet overlooked factors in telescope performance. When telescopes move from warm indoor environments to cool outdoor conditions, the temperature differential creates convection currents within the optical tube that act as constantly shifting lenses, severely degrading image quality.
The physics involves air density changes caused by temperature variations. Warm air has lower density than cool air, creating different refractive indices that bend light rays unpredictably. For telescopes with 1-meter focal lengths, even 0.1°C temperature differences along the optical path can degrade images noticeably.
Accelerating Thermal Equilibration
Active cooling techniques can reduce thermal equilibration time by up to 50%. Ventilation strategies vary by telescope design:
For Newtonian Reflectors:
- Position the tube upward to allow warm air to rise and escape naturally
- Install cooling fans behind the primary mirror to accelerate heat dissipation
- Use vibration-dampening mounts for fans to prevent image shake
For Refractors:
- Position the tube downward (without diagonal) to promote air circulation
- Remove dust caps early to allow air exchange
- Avoid active cooling, which can introduce moisture and vibration issues
For Compound Telescopes:
- Plan extended setup time – these designs require the longest cooling periods
- Store in unheated areas like garages to minimize temperature differential
- Consider professional cooling systems for large aperture instruments
Environmental Optimization Strategies
Ground surface selection significantly impacts seeing quality. Grass provides thermal stability superior to concrete or asphalt, which store solar heat and create rising air currents throughout the night. Elevated locations often provide steadier air masses due to reduced ground-level thermal interference.
Seasonal considerations affect both cooling requirements and seeing conditions:
- Winter: Longer cooling times due to greater temperature differentials, but typically better seeing conditions
- Summer: Shorter cooling periods offset by increased atmospheric turbulence
- Spring/Fall: Optimal balance of reasonable cooling times and stable atmospheric conditions
Magnification and Eyepiece Management
Understanding the Over-Magnification Trap
The most common mistake beginners make involves starting observations with high-magnification eyepieces. This approach creates dim, shaky images that prove impossible to focus correctly, leading to frustration and abandonment of observing sessions. Professional astronomers universally begin observations with low magnification to locate and center targets before increasing power.
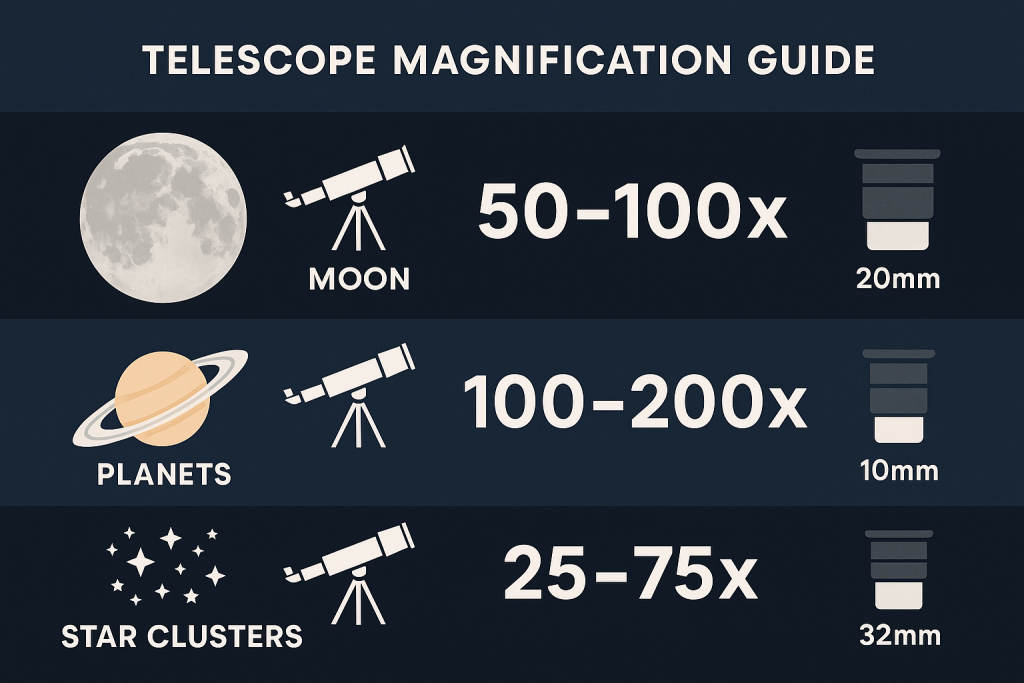
Telescope magnification guide for different celestial objects
Magnification calculation: Telescope Focal Length ÷ Eyepiece Focal Length = Magnification
- Example: 1000mm telescope ÷ 25mm eyepiece = 40× magnification
Practical Magnification Strategy:
- Initial acquisition: 25-40× magnification (32mm or 25mm eyepieces)
- General observing: 40-80× magnification (20mm to 12mm eyepieces)
- High detail work: 100-200× magnification (10mm to 6mm eyepieces)
- Maximum useful: Rarely exceeds 250-350× due to atmospheric limitations
Progressive Magnification Methodology
Successful observing follows a systematic power progression:
- Locate the target using the lowest magnification and the finder scope
- Center precisely using slow-motion controls at low power
- Increase magnification gradually only after achieving perfect centering
- Monitor atmospheric conditions – back down if image becomes unstable
Eyepiece Selection for Different Targets:
- Moon exploration: Start at 40×, increase to 100-150× for detail
- Planetary observation: Begin at 60×, work up to 200× when seeing allows
- Star clusters: 25-50× provides optimal field coverage
- Galaxies and nebulae: 40-80× balances contrast and light-gathering
Barlow Lens Troubleshooting
Barlow lenses amplify existing problems while introducing new challenges. The most common Barlow issue involves insufficient focuser travel – particularly problematic with short focal length telescopes and close terrestrial targets.
Barlow Focus Problems:
- Cannot reach focus: Barlow may require more outward focuser travel than available
- Blurry images: Poor quality Barlows degrade optical performance significantly
- Mechanical binding: Barlow tube may not insert properly due to the focuser restrictions
Solutions for Barlow Focus Issues:
- Remove the extension tube from the Barlow body to reduce the required back-focus distance
- Use extension tubes between the Barlow and the eyepiece to fine-tune the focus position
- Test without Barlow first – ensure basic telescope function before adding complexity
Equipment Protection and Safety
Critical Safety Protocols
Solar observation represents the only area of astronomy where equipment mistakes can cause permanent bodily harm. Never look directly at the sun through any optical instrument without proper full-aperture solar filtration. Even glances through unfiltered telescopes can result in immediate and irreversible eye damage.
Essential Solar Safety Rules:
- Use only full-aperture solar filters mounted securely over the telescope’s front opening
- Never use eyepiece-mounted solar filters – these can crack from heat buildup and cause instant blindness
- Cover all finder scopes during solar observation to prevent fire hazards and crosshair damage
- Ensure filters are genuine – counterfeit solar filters have caused permanent eye injuries
Optical Cleaning Best Practices
Telescope optics should be cleaned only when necessary. Over-cleaning causes more damage than accumulated dust, as cleaning cloths can trap abrasive particles that scratch optical surfaces permanently. A few dust specks on mirrors or lenses have a negligible impact on image quality, while scratches from improper cleaning create permanent performance degradation.
When Cleaning Is Necessary:
- Significant dust accumulation covering substantial portions of optical surfaces
- Fingerprints or oily residues that scatter light and reduce contrast
- Moisture spots or condensation residue affecting light transmission
Safe Cleaning Protocol:
- Use optical-grade tools only – camera lens cleaning supplies work well
- Remove loose dust first using bulb blowers, never compressed air
- Clean from the center outward using circular motions with fresh tissues for each pass
- Avoid touching cleaned surfaces – fingerprints undo cleaning efforts immediately
Vibration Control and Stability
Telescope vibration degrades image quality significantly, particularly at higher magnifications. Vibration sources include wind, tripod instability, focuser adjustment, and accidental contact with the instrument. Vibration suppression pads can reduce vibration amplitude and settling time by up to 93% when placed under tripod legs.
Stability Enhancement Methods:
- Vibration suppression pads: Place under each tripod leg on any surface
- Tripod weight loading: Hang weights from the tripod center to the lower center of gravity
- Proper telescope balance: Distribute weight evenly to minimize vibration susceptibility
- Surface selection: Grass provides better stability than concrete or wooden decks
Troubleshooting Decision Tree
DIY Solutions vs. Professional Help
Most telescope problems beginners encounter have simple solutions requiring no technical expertise. Approximately 80% of setup issues are resolved through systematic troubleshooting of temperature, alignment, and magnification factors. However, specific problems require professional attention or component replacement.
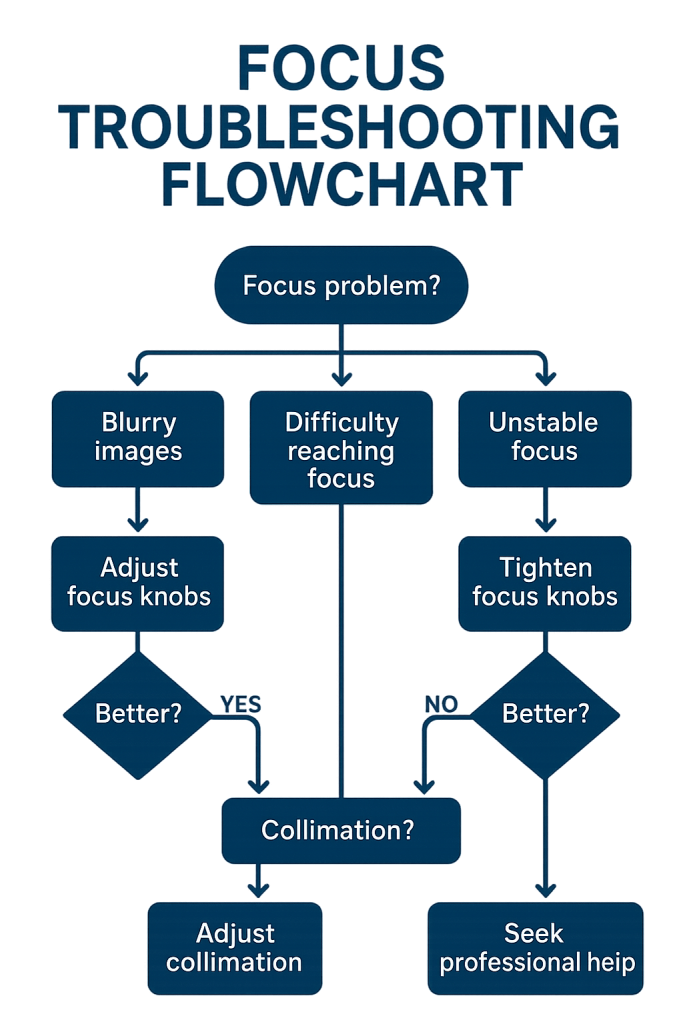
Telescope focus troubleshooting decision tree for beginners
Problems You Can Fix:
- Finder scope alignment using daytime targets and adjustment screws
- Fundamental focus issues through magnification adjustment and thermal management
- Dust cap oversights and simple cleanliness problems
- Mount stability through proper setup and weight distribution
- Battery contact problems in red dot finders
Professional Help Required:
- Optical damage including scratched mirrors or cracked lenses
- Major collimation requires precision adjustment of primary mirrors
- Electronic failures in computerized mounts and drive systems
- Structural damage from drops or impacts requires mechanical repair
Learning Resources and Community Support
Local astronomy clubs provide invaluable hands-on assistance for troubleshooting complex problems. Experienced club members can diagnose issues that mystify beginners and provide practical solutions. Many clubs hold “star parties” where beginners can observe proper setup techniques and receive personalized guidance.
Online resources include manufacturer technical support, astronomy forums, and video tutorials specific to telescope models. However, hands-on assistance often proves more effective than written instructions for complex procedures like collimation or mount adjustment.
Prevention Through Proper Procedures
Pre-Session Preparation Checklist
Developing consistent pre-observing routines prevents 90% of common telescope problems. Professional astronomers follow strict setup protocols that beginners can adapt to their equipment and observing style.
Equipment Preparation:
- Weather assessment: Check the forecasts and temperature trends
- Early setup: Begin telescope cooling process 30 minutes to 2+ hours before observing
- Component inventory: Verify all eyepieces, charts, and accessories are available
- Battery checks: Test red dot finder and computerized mount power levels
Setup Verification:
- Finder alignment check: Verify alignment using distant daytime targets if recently transported
- Mount stability test: Ensure all clamps engage properly and tripod legs are secure
- Optical cleanliness: Inspect eyepieces and remove dust caps systematically
- Safety confirmation: Verify no solar observation hazards exist in the setup area
Post-Session Maintenance
Proper equipment storage extends telescope life and maintains optical performance. Moisture management represents the most critical post-session concern, as condensation trapped inside optical tubes can foster fungal growth that permanently damages coatings.
Post-Observing Protocol:
- Allow moisture evaporation before replacing dust caps permanently
- Replace dust caps loosely initially to permit air circulation, and tighten after complete drying
- Store in a temperature-stable environment to minimize thermal cycling stress
- Log session notes, including any problems encountered for pattern recognition
From Problem to Passion
Managing Expectations and Building Skills
The learning curve for telescope mastery extends over months, not hours. Most beginners resolve 80% of common problems within their first month by following systematic troubleshooting approaches. However, developing expertise in areas like collimation, advanced finder alignment, and atmospheric assessment requires ongoing practice and community involvement.
Realistic Skill Development Timeline:
- First session: Basic setup, dust cap removal, simple alignment
- First month: Temperature management, magnification selection, finder alignment
- First season: Atmospheric assessment, advanced troubleshooting, maintenance procedures
- First year: Collimation proficiency, equipment optimization, teaching others
Building Troubleshooting Confidence
Each successful problem resolution builds confidence and enjoyment. The transition from frustration to fascination typically occurs when beginners master the fundamental trinity of telescope setup: thermal equilibration, proper magnification, and accurate finder alignment. These core skills enable consistent, rewarding observing experiences that motivate continued learning and exploration.
Success Formula for Beginners:
- Allow adequate cooling time based on telescope type and temperature differential
- Start with low magnification for target acquisition and initial focusing
- Align finder scopes during daylight using systematic, distant target methodology
- Build systematic troubleshooting skills through practice and community involvement
The reward of sharp, detailed views of Saturn’s rings, Jupiter’s moons, or distant galaxies makes the initial learning investment worthwhile. Most experienced astronomers report that overcoming early setup challenges created a deeper appreciation for the hobby and stronger technical skills that enhance lifelong observing pleasure.